

Is your sofa looking old and worn out? Do you know you can give it a new life and make it attractive once more? How you might be asking?
With a new sofa cover, you can transform your sofa. Hence, this article will show you how to make sofa covers.
Benefits of Making Your Sofa Covers
Although you can easily buy new sofa covers, there are many benefits to making one yourself. Let’s briefly discuss them.
You save money
One thing most people don’t know is that DIYs in most cases do not cost as much as buying it from a store. This is the case with making a sofa cover yourself.
You make all the decisions
Making a sofa cover yourself allows you to choose how you want it to look like from beginning to the end. This is unlike what you get when you purchase from a store.
You get to choose the type of fabric you want, the color, and the final fitting of the sofa cover.
Making your Sofa Cover
We’re sure you are eager to learn already; so let’s begin.
Making a sofa cover is divided into three parts:
i. Preparing the sofa cover material
ii. Creating the sofa cover pattern
iii. Sewing the sofa cover
We will walk you through these parts in easy to follow steps.
Items Needed
i. Butcher paper or muslin for the cover pattern.
ii. Fabric for the cover
iii. Straight pins
iv. Scissors
vi. Chalk
vii. Measuring tape

Preparing the Sofa Cover Material – Part 1
Step 1: Decide on the amount of material you require
This decision depends on the size of your sofa.
You also need to verify the measurement of how fabrics are sold. In most cases, only the length is taken into account in measurement while the width might vary, and they are measured by the yard.
You can take a rough measurement of your sofa to give you an idea of how much material is required. Note that such measurement will never be accurate due to the contours and edges of your sofa.
Step 2: Purchase the material.
This can be done at a fabric store which will allow you to assess the material firsthand if it suits you. You also get to check out the width of the material.
Or, you can buy it online: The major advantage this gives you is convenience. You don’t have to start going from fabric store to fabric store.
Some online purchases can be returned if they do not meet your requirements. You might want to have such a clause in your buying option if the need arises.
When buying the material, it is preferable you go for solid color fabrics rather than stripes or patterns. This is because stripes or patterns can be somewhat tricky when you sew them. Matching them requires more effort, hence, we advise against it.
Also, go for a well-draped fabric as they make the whole working process easy.
Step 3: Wash the material and dry it.
There are two major reasons why this should not be ignored. First of all, this action causes the material to become soft. This makes the entire work process easier for you.
Secondly, shrinkage is accounted for. Fabrics are known to shrink after washing, so this action will help you determine the amount of the fabric’s shrinkage. And since you’ll have to wash it later on after using it for a while, it makes more sense.
However, we must warn you that you follow the washing instructions for your fabric material. This article will give you an idea of how to clean your sofa fabric.
Step 4: Iron sofa cover material
Before you start working on the material, we advise you to iron it first. This will get rid of creases and make it smooth to work with.
Creating the Sofa Cover Pattern – Part 2
Step 1: Wrap sofa with butcher paper or cheap muslin
The first step in creating a sofa cover pattern for the sofa is to wrap the sofa with either butcher paper or cheap muslin.
Make sure the wrapping confirms to the shape of your sofa. You can choose if you want it to be loose or fitting.
You might have to use 2 or 3 large paper covers. If this is the case, use safety pins to tack them in place.
You can decide to skip using the paper or muslin and use the material straight away. Just drape the fabric material over your sofa but make sure the wrong-side is facing up. After this, use a chalk to trace the pattern on the material.

Step 2: Use chalk to mark pattern
The places marked are where you will cut the pattern out. Ignore the arm fronts for now as you’ll do that in the next step.
The cut pattern should have the following sections:
i. Outside back
ii. Seat area. This includes the front section (the part that falls to the floor) and the backrest.
iii. The sides but not including the arm fronts.

Step 3: Measure arm fronts
Measure the arm fronts and create a pattern for it. You don’t need to create two patterns; one is enough for both.
i. Follow the steps below to create the pattern:
ii. Cut out a rectangular section of muslin or paper. This cut out section should be a size estimate of the sofa arm fronts.
iii. Hold this pattern to either arm fronts with pins.
iv. Trace out the arm front’s outline with a chalk.
v. This single pattern can be used for both armrests.
Step 4: Cut the patterns
With a scissors, cut out the outline you’ve traced.
Sewing the Sofa Cover – Part 3
Step 1: Cut the material
Place your fabric material on a table or the floor. Then bring the cut pattern and place it on your material.
Use chalk to trace out the outline of the pattern on your material. After marking, cut out the sections. It is recommended you leave at least a 1-inch seam allowance.
Step 2: Pin cut out sections together
After step 1, place the cut out fabrics on your sofa with the wrong side facing up. Then use the pins to attach the sections. Make sure the attached sections meet at the exact outlines.

Step 3: Sew arm fronts
The next step is to remove the sections that you have attached to the sofa. Don’t remove the pins you use for the arm fronts sections.
Place the wrong side of the material up in the sewing machine.
Join the sections along the chalk line with a sewing machine. After sewing, take out the pins.
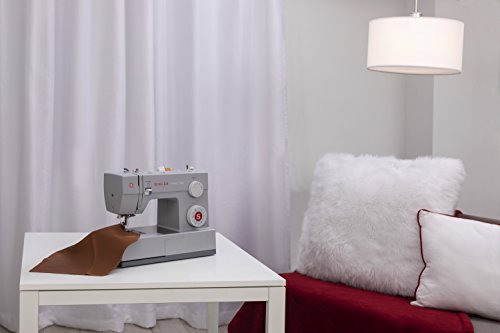
Sewing machines used to be common in most homes a century or so ago. But that’s not the case nowadays for most folks. Yet, these machines are quite helpful at home.
One that will serve well among the many in the market, especially for this process, is the SINGER | Heavy Duty 4423 Sewing Machine.
Step 4: Sew the sofa cover
Take away the seating and back pieces that were attached to the sofa. While doing this, make sure you don’t remove the pins.
After removing the pieces, join the pieces together with a sewing machine.
- Heavy Duty Machine: 23 built-in stitches which include basic, decorative, stretch, buttonhole, etc. that allows for different kind of sewing projects
- Automatic Needle Threader: You can easily thread the needle eye thanks to this feature
- High Speed Sewing: The Singer machine can sew up to 1,100 stitches in one minute
- Solid Metal Frame: Made from superior metal frame, stainless steel that can withstand heady duty pressure from fabrics thanks to its powerful motor
- 25 Year Warranty
Prices pulled from the Amazon Product Advertising API on:
Product prices and availability are accurate as of the date/time indicated and are subject to change. Any price and availability information displayed on [relevant Amazon Site(s), as applicable] at the time of purchase will apply to the purchase of this product.
Step 5: Return the sides and body to your sofa
While doing this, ensure the sofa cover fits the sofa tightly and it falls uniformly. Then use pins to attach the body and sides again.
Step 6: Sew the sections back to the body
Take the side sections and sew them to the body. Make sure you follow the chalk lines as you sew.
Don’t forget to take out the pins as you sew.
Step 7: Check if the sofa cover fits
Once you are done with step 7, verify the fit of the cover. Do this by placing the cover with the wrong-side out on the sofa. Ensure it fits evenly across the sofa’s surfaces. Also, check if the seams are straight.
If any points need to be fixed, do that now. Especially the seams that are not straight. Remove such using a seam ripper before sewing them again.
Step 8: Trace hemline at the sofa cover’s bottom
Take the cover from your sofa after step 7 and place it on a flat surface (a table or the floor would do).
Trace hemline using a chalk along the cover’s bottom. Give an allowance of ½ to 1 inch from the fabric’s edge.
Make sure the hemline is straight. You can use a measuring tape to confirm this.

Step 9: Fasten the hem with pins
Now fold the hem and fasten it with pins.
Step 10: Iron along the hemline
This step is not necessary but is important. Ironing the hem causes it to be straight and clean thereby making sewing easier.
Step 11: Sew the hem
Make the hem using a sewing machine. While sewing, check the stitches to see if they are properly attached.
Step 12: Place the sofa cover on your sofa
Place the cover on the sofa with the right-side out. Tuck in the cover carefully into place.
Your sofa should be looking beautiful at this point.
Please watch the next video.
Did You Know You Can Make Sofa Covers from your Bedspreads?
Yep, you can. And you don’t even have to buy a piece of new fabric. Let’s show you how to do this real quick.
Step 1: Measuring
Follow the same process of measurement as we shared above.
Step 2: Choosing the fabric
Although we said you don’t have to buy a new piece of fabric, however, you need to make sure your bedspread is still in good condition.
So if your bedspread doesn’t fit the bill above, we recommend getting heavy cotton rather than satin or silk. Heavy cotton is easier to wash and is suitable for sofa covers than the others.
Step 3: Draping
How you drape the bedspread over your sofa depends on if the sofa has a cushion or not. And if you intend to cover them separately or not.
Now drape the bedspread across the sofa and tuck it in the space found between the arms and cushions as well as the back and the cushions. Then drape it over the sofa arms in soft gathers.
If you want to use two bedspreads to cover the sofa, then take away the cushions. First, cover the body of the sofa with one bedspread and then use the second on the cushions. Then tuck in the excess fabric edge.
Step 4: Securing
Fix a cording or ribbon to the bedspread on each side of the sofa’s arms and pin them. Then tie it in bows or square knots. Use a staple to turn it to a custom fit sofa cover. Conceal the staples using a cording that has been fastened using a hot glue gun.
Check out the video below.
Some Tips to Follow While Making Your Sofa Cover
i. Use railroading while sewing your fabric. This will prevent seam placement problems.
ii. Make use of a large surface for cutting, measuring, and sewing. Use either a very large table or the floor (provided it has enough space). This will prevent unnecessary errors during any of the following processes.
iii. Don’t sew any part without making sure it fits and is pinned first. It will prevent you from damaging the fabric.
iv. Do not be so worried if the cover isn’t as fitting as you want. You can easily tuck the extra fabric into the sofa to give the fitting you desire.
v. Do not throw away the pattern. Keep it safe. This will help you when you need to make a new sofa cover. You won’t go all through the trouble of creating a new pattern.
Maintaining the Sofa Cover
Maintaining the sofa cover is equally important as making it in the first place. The few tips will help you maintain your newly fitted cover.
i. Clean regularly. Make sure you follow the fabric’s label.
ii. Clean spills and other stains immediately they occur. Do not put cleaning them off.
iii. Hand-stitch tears on your fabric.
iv. Patch holes. Make use of excess fabric from the cover. This is one of the reasons you make excess allowance while sewing.
Final Words
With the steps shared above, we trust you can conveniently make a sofa cover and give your sofa that breath of freshness it so deserves.
If any part of this article is unclear to you, please let us know in the comments section below. And if you have tried making a sofa cover before, how was your experience? We’ll also like to know.
