The traditional and most common method of making a blanket fort is by using chairs. But what if you don’t have chairs available?
Don’t worry if you don’t know how to go about it, this article will guide you on how to make a blanket fort without chairs.
A blanket fort is an interesting way to keep your kids occupied indoors and entertained while learning in the process.
They could play inside the fort for a very long time. Besides, it is a great way to spend time with your kids as you build and have fun together.
Steps to Make a Blanket Fort without Chairs
Method 1 – Using Cushions
The following are items you will need to make a blanket fort using cushions:
i. Blankets (lots of it)
ii. Cushions or cardboard boxes
iii. Pillows
iv. Mop stick or broom (optional)
Follow the steps below to make a blanket fort using cushions:
i. Gather the needed items.
ii. Position the cushions.
iii. Position the pillows.
iv. Throw blankets over the cushions.
v. Position the mop stick.
Let’s explain these steps a bit…
Step 1: Gather the needed items
This is where you get the items needed to make the fort. Most of your items can be gotten at home. Therefore, you don’t need to go shopping for one unless it isn’t enough.
Step 2: Position the cushions
After getting sufficient cushions, place them in a standing position. The cushions will serve as the fort’s walls.
If you don’t have sufficient cushions, you can make use of cardboard boxes.

Step 3: Position the pillows
While the cushions serve as the walls, the pillows serve as the foundations. Therefore, place them close to the cushions to support their standing position.

Step 4: Throw blankets over the cushions
The blankets function as the roof of the fort. To put them in place, simply drape them over your cushions.
Drape the blankets in such a way that they hold the cushions upright and firmly in place.
Step 5: Position the mop stick
Although this step is optional, it enhances the fort’s design.
Take your mop stick (or a broom) and place it in the center of the fort. Use it to push the blanket up.
Make sure the stick is secure to avoid it from injuring someone in case it falls.
If you don’t have a mop stick on hand, allow us to recommend the Rubbermaid Commercial Fg636400Lac Lacquered-Wood Handle With Threaded Metal Tip.
Method 2 – Using Other Furniture Items
Follow the steps below to make a blanket fort using other furniture items:
i. Select the items you want to use.
ii. Position the items.
iii. Cushion the floor.
iv. Drape the blanket over the items.
v. Fasten the blankets in place.
Details about the steps above are given below…
Step 1: Select the items you want to use
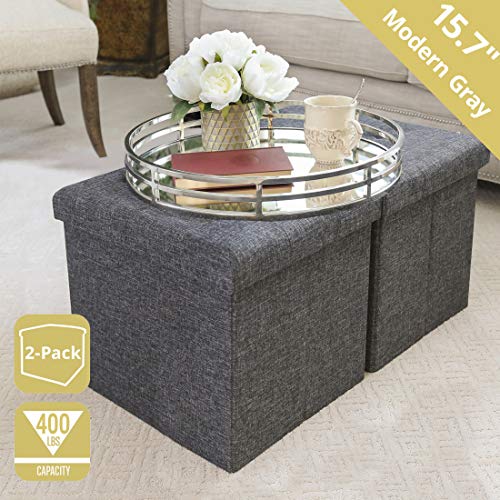
Look around the house and see what solid items can be used to support the fort. Items like ottomans, boxes, and laundry hampers can be used.

Step 2: Position the items
If you will be using several items to make the fort, place them side by side.
Make use of items with varying heights. This will allow the fort to have low and high places, which leads to more fun.
The items should also be high enough to accommodate someone in a sitting or crawling position.
Step 3: Cushion the floor
To make the floor comfortable, throw in some pillows like this Beckham Hotel Collection Gel Pillow or cushions at the corners of the fort. Place additional blankets on the floor and sleeping bags.

Step 4: Drape the blanket over the items
The blanket to be used must be large enough to cover the furniture items.
Take the blanket and drape it over the pieces of furniture you already positioned. Make sure it covers the edge of each piece of furniture.
To prevent the blanket from sagging down in the middle of the fort, make sure it is stretched and firm.
Tip: Use darker colored blankets and more blankets to make the inside part of the fort darker. Inversely, use light-colored blankets and fewer blankets to make the inside of the fort brighter.
Step 5: Fasten the blankets in place
To make certain the blanket does not slip off later on; it is advisable to fasten the blanket in place.
You can do this by using a clothespin or some heavy objects to fasten the blanket at its edges.
Whereas a clothespin like the Home-X Wooden Clothespins may only work for certain furniture items, it may not work for others.
Method 3 – Using a Curtain Rod
This method is perfect if you want your fort to be high enough that one can walk inside it. It is also suitable for small spaces such as a closet, hallways, etc.
Here are the steps to follow to make a blanket fort using a curtain rod:
i. Position the curtain rod.
ii. Drape blanket over the rod.
iii. Position smaller furniture items.
Step 1: Position the curtain rod
Take the curtain rod over the center where the roof of the fort will be.
Ensure the rod is properly secured before moving to step 2. To test how secure it is, tug the rod gently at the center.
Step 2: Drape blanket over the rod
Pick the blanket you intend to use and drape it to cover the curtain rod. Make sure the blanket is very large to cover across and long enough so that it extends to the fort’s floor.
Sofa slip covers can also be used if you don’t have enough blanket.
Step 3: Position smaller furniture items
Now take smaller furniture items and use them as a support for the lower part of the blanket. This will help keep the blanket in place.
Do not use furniture items that aren’t sturdy else they will fall off easily.
Method 4 – Using a Clothesline
This method is perfect if you desire a very long and large fort.
Here are the steps to follow when making a blanket fort using a clothesline:
i. String the clothesline.
ii. Drape blankets over the clothesline.
iii. Secure the blanket.
Step 1: String the clothesline
Tie a clothesline from the end of the room to the other. To ensure the clothesline is well-secured, attach it to sturdy items like a doorknob.
Tip: You can make the fort longer by joining 2 or more clotheslines. Or you can save yourself the trouble by getting a longer clothesline like the Whitmor 100-Foot Cotton Clothesline.

Step 2: Drape blankets over the clothesline
Choose a blanket that can cover the whole length of the clothesline. Then drape it over the clothesline.
Step 3: Secure the blanket
Secure the blanket by using the small furniture items on the floor of the fort. This will prevent the blanket from slipping off.
Method 5 – Using a Bunk Bed
Bunk beds can be used to make a blanket fort. The final size of the fort is dependent on the size of the bed.
In most cases, this method is suitable for just one or two people occupying the fort at a time.
Making a fort with this method is quite easy.
Step 1
Just hand a blanket from the top mattress, but tuck it in at the top to secure it.
Step 2
Let the blanket flow down to cover the bed at the bottom.
Step 3
Then cover the edge of the bed with a smaller blanket. And your fort is ready.

Method 6 – Using a 4-legged table
This method is the easiest discussed so far.
The steps below will show you how to make a blanket fort using a 4-legged table:
i. Select a table.
ii. Drape the blanket.
Step 1: Select a table
Choose a table with 4-legs that will serve as your fort’s base. Make sure the table is quite high to accommodate someone that is crawling or sitting.
Step 2: Drape the blanket
Drape a blanket over the table. Make sure the blanket is very to fall and cover the table at its sides.
Check out the video below.
Making the Fort Fun and Comfortable
There are different ways to make the blanket fort more fun and comfortable; here are a few of them:
i. Make tunnels.
ii. Cool the fort.
iii. Light it up.
iv. Play games and have fun.
v. What’s a fort without food?
Make tunnels
You can make tunnels in the fort by using an empty box. Just open up the box at both ends and place it on its side.
This box can be used to connect to another fort; that is if you have two forts. Or it can serve as an entrance into the fort.
To blend the tunnel to fit the fort, cover the box with a blanket.
Cool the fort
Forts are known to get hot over time. You can cool the fort by placing a fan at the entrance of the fort. Placing it at such a strategic position will allow air to circulate evenly.
Do not put a blanket at the back of the fan. This will prevent the blanket from getting stuck in the fan.
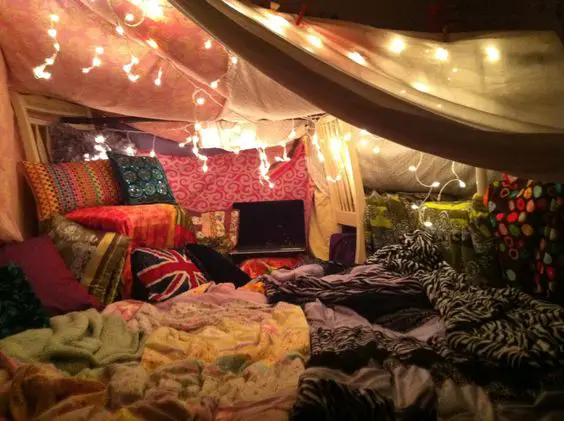
Light it up
Forts can be somewhat dark especially if you use dark-colored blankets. So lighting up the fort will make it look nice and comfortable to stay in for a long time.
Also, lighting up your fort gives allows you to read in there. This can be used to read bedtime stories to your kids.
Christmas lights are great for blanket forts. You can line them across the ceiling or place them around the corner of the fort’s floor.
Battery-powered lanterns, flameless candles, flashlights (for scary storytime) can also work wonders inside the fort.

- UL Certified
- For indoor and outdoor use
- 20.63 lighted length
- Connect up to 5 light sets
- Suitable green wire for tree decoration
- Includes 2 spare bulbs, 2 flasher bulbs, and 1 spare fuse.
Prices pulled from the Amazon Product Advertising API on:
Product prices and availability are accurate as of the date/time indicated and are subject to change. Any price and availability information displayed on [relevant Amazon Site(s), as applicable] at the time of purchase will apply to the purchase of this product.
Play games and have fun
A fort is made for fun. Therefore, go into your secure fortress with enough games to play: Board games, card games, even video games can be brought inside the fort.
Books are also a great addition. You can decide to even watch a movie in there on a laptop or a tablet.
However, do not take in too many things into the fort. Make sure you have enough room to move inside the fort.
What’s a fort without food?
It would spoil the fun if you had to constantly go out to get some snacks and food.
You can prevent this by stocking up your fort with enough to eat and drink during the period you’ll be in the fort.
Fruits, chips, popcorns, crackers, cookies, water bottles, juice boxes are just a few examples of the items you could bring into your fort.
But as you know very well, whatever goes into your body, a portion will have to come out eventually? So, go easy on the snacking and drinking while in there.
Check out these other interesting articles below:
What is a Cocobolo Desk — The Full 411
How to Fix Sagging Patio Chairs — 8 Easy-to-Follow Steps
How to Refinish Wood Chairs — In 12 Easy to Follow Steps
How Long Do Power Recliner Motors Last — The Ultimate 411
How to Clean Suede Sofa — Getting Rid of 4 Common Stains
How to Reupholster a Recliner — In 10 Easy to Follow Steps
How to Make a Blanket Fort without Chairs – FAQS
What can you do inside a blanket fort?
The following is list of things you can do inside a blanket fort:
i. Do a little snacking. You could eat pie, cookies, etc.
ii. Take a quick or a long nap.
iii. Engage in studying.
iv. Read a book or an eBook.
v. Make plans.
vi. Watch a movie.
vii. Play board or card games.
viii. Play video games.
ix. Listen to an audiobook or podcast.
x. Pillow fight.
xi. Read a comic book.
xii. Practice some yoga.
xiii. Meditate.
How do you make a romantic fort?
To make a romantic fort, you need to fill ad decorate it with romantic features and items. This is because a romantic fort is just your typical fort but with certain romantic features.
You can make paper hearts to decorate the fort. After cutting out the heart shape, you can either attach them to the walls and the floors of the fort. Or you can hang them from the ceiling with thin ropes.
The paper hearts can also be used to make a heart-themed garland. To do this you’ll need to attach several hearts to a single rope. Then, hang the garland where you think is appropriate.
Put in some dim colored lighting and throw in enough snugly pillows.
Is it safe to sleep in a blanket fort?
It is very safe to sleep in a blanket fort. This is provided you constructed it properly.
A blanket fort is made of blankets, cushions, sheets, pillows, etc. Most of the items used are usually comfortable except for the supports in some cases. These items create a comfortable environment that can easily put you to sleep.
It is a result of this that blanket forts are used for most sleepover parties. Also, when constructed properly, they can be quite quiet which makes sleeping more enjoyable.
How do you make a comfy bed on the floor with a blanket?
The following tips will help you to make a comfy bed on the floor with a blanket:
i. Create a space on the floor and make sure there isn’t any form of clutter. The space should be enough for you to stretch your limbs in all directions.
ii. Place the blanket on the floor. We recommend you use very thick blankets or multiple blankets. This will make it more comfortable.
iii. Use a pillow but make sure it is a thin one. Large and bulky pillows can strain the neck when lying on the floor.
iv. You can use another pillow for additional support to enhance comfort.
Is it better to sleep on the floor or a bed?
Sleeping on the floor has its benefits but it is not necessarily better than sleeping on a bed.
One of the benefits many have claimed that sleeping on the floor offers is that it relives back pain. This is because the floor is hard and can support the body well.
Mattresses that are too soft, on the other hand, causes spin curving when your body sinks into the mattress.
Another benefit is enhanced posture. This is also because of the better support the floor offers.
Disadvantages of sleeping on the floor also exist which include back pain (yep, some folks said it gives them back pain), allergies from dust mites, dust, mold, etc. and increased cold exposure.
Final Words
Making a blanket fort is one way to keep your kids occupied while they have fun especially when they can’t go out. Also, staying with them in the fort is a great way to bond with them.
We hope the methods shared above have helped you create your blanket fort.
Which of the methods will you use? Or if you have used any of these methods before, we will like to hear your experience.
If you have further questions about this post, please let us know in the comments section below. We always do our best to reply to each comment from our esteemed readers.